Showing posts with label Tools. Show all posts

Thursday, July 6, 2023

Rudder Trailing Edge and Counterweight Completed!

 So June was quite the whirlwind.  Between school wrapping up for the year, the kids being home part of the month, and work being extremely busy with summer travel starting, there was just not much time to build and keep my sanity.  I ended up taking much of the month off to spend time with the kids and focus on the things that needed the most attention.  Finally, after some time away and finding a free moment, I finally got to the trailing edge of the rudder this week.

Backriveting the trailing edge

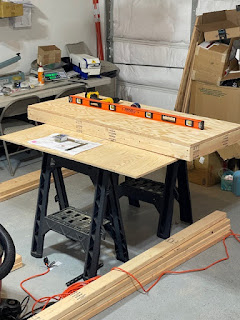
My Cleaveland Tool kit had a squeezer attachment for the trailing edge included in it. I've heard some mixed opinions about the tool from the forums and other builders online, but I wanted to give it a shot myself.  I took the first rivet and tested using the squeezer attachment only and wasn't 100% happy with the result.  So I then went to the old fashioned method which was taught in the Synergy class and riveted with the mushroom set on some steel angle.  The steel angle made it easy as I didn't need to constantly reposition the rudder assembly over the small backrivet plate.  This allowed me to basically do one entire half at a time.  

Squeezing a few of the rivets that needed it at the end.

So my final setup to do this was the angle iron of steel on the table edge, the rudder over that, and then my wood and block on top to hold the rudder down.  This worked really well and I had mostly great results.  When I finished the normal back riveting, I noticed a few had a little proudness on the shop head, so I squeezed those and it finished setting them perfectly into the dimples.  So I think the final result was a hybrid of backriveting first and then squeezing to clean up the final result.  This seemed to be the best result, and sounded pretty much like what Austin did from Youtube.  

After taking on the trailing edge, I moved onto the rudder counterbalance arm.  This involved installing a counter weight, drilling my first nutplate, bending the skin to cover it, and then final assembly.  The directions spell out the method pretty well, but it takes a little finesse.  I bent the skin like it said, clamped the wood on it, and did the hammer method.  I wasn't thrilled with how many hits it took to get the bend desired, but it stated an 85% bend in the manual.  I got about there and then started working on the final bend and nutplates.  Using the screws to dimple the skin for drilling was a simple process that is pretty smart when you think about it.  I made the drill holes and dimpled everything up.  After I figured out how to drill the nutplate, it was smooth sailing.  Overall, I am happy with the final result, I am not sure if I should of made the skin a bit tighter to the weight, but I guess I'll find out down the road at final assembly.

Bending the skin around the Counterbalance Weight


Hammering the skin crease in.


After I finished the counter weight skin, it was time to roll the leading edge, the last step of the Rudder assembly.  Section 5 calls out for a 1 inch pipe, but the RV-10 manual says use a 1.25 inch pipe.  So a trip to Lowes was in order to get the correct pipe.  My reading, Youtube review, and other resources all have very mixed opinions on the pipe size and method.  I have seen some use clecos, some use duct tape, and others use brute force to get the roll.  It's not the most simplistic idea when looking at it, but I am sure I will figure it out.  So off to Lowes and then we will close out the Rudder for good.

Friday, February 17, 2023

A New Tool, More Priming, and an Oopsy...

 Building has continued as of late and this past week was expected to be in the 50's and low 60's which is totally out of the norm for New York in mid winter.  As such, I made a decision to make sure I was ready to prime before the super warm day yesterday.  I had finished up all of the match drilling and had taken apart the rudder assembly.  The last step remaining was to countersink the trailing edge wedge.  Some builders reported doing this with a drill by hand, but that is a lot of holes to do.  In my cleaveland kit there was a jig designed for a drill press.  This allows you to setup a drill press, configure the countersink cage, and then repetitively drill through the wedge more quickly and efficiently.  And the wedge is kept perfectly at the appropriate angle to drill.  However, I don't own a drill press.... yet.

I had a nice gift card for Lowes leftover from Christmas and decided that it was time to put it to good use.  I went to Lowes and picked up their countertop drill press from Porter Cable.  I already have the band saw and grinder, so it fit in perfectly to my collection.  I got it home, took some time to assemble, and was ready to start countersinking soon enough.  Add in some small clamps and I had the press all rigged up and ready to go.

Drill Press with Trailing Edge Jig

It took me two sessions to do, but I slowly made my way through both sides of the trailing edge wedge.  This part is thin but has an important job of joining the two skins together when I do the final assembly.  I took my time getting the first few holes setup and making sure they fit my test dimple plate perfectly.  After fine tuning the cage, I was off to the races to finish the rest of the wedge.

Nice Countersink Holes

Now that the wedge was finally countersunk, I was all ready to get started priming on Thursday.  I woke up to the temperature already in the high 50's and got setup early.  I used the same setup with my priming racks over the 2x8's.  After getting the kids off to school, it was time to bust out the Ekoetch and start scrubbing.  The etching is very time consuming and tedious work to get done, but its nice cleaning everything up.  Again, its not a big deal to have lots of scratches as this helps the primer bond to the surface.  The unprimed outer parts will eventually be sanded and scratched up when they are ready to paint.  As long as we have no large and deep scratches, we are good to go.  I have to figure out the best way to protect the skins a bit when moving them around the racks.  My racks have chicken wire on top and make some small scratches.  

I had one hiccup or oopsy during my etching session.  One of the last pieces I etched was the trailing edge wedge.  Now doing this was a mistake because we don't want to prime this as it can effect the adhesion of the Proseal when I build the rudder.  But as I was scrubbing the wedge with the scotchbrite, the wedge literally snapped in my hand.  The wedge is so narrow, just gentle pressure caused it to bend and snap.  I now have to recut and redo the countersinking. I am not looking forward to shipping a piece of trailing edge by itself.  I might wait until I order the fuselage and include it in that if I don't have enough pieces.

Snapped Trailing Edge

Priming wasn't too big of a deal.  I gave everything a very thorough stir and made sure to mix it well.  I still like my little detail paint spray gun, but as we get into bigger assemblies, I might need something larger.  I had to replace and refill the spray tank once during the session.  I'd prefer to avoid doing that mid spray if I can.  After everything was done, I broke it all down and got everything cleaned up.  Next week I will start riveting together the rudder pieces for the final time.  This section will be an introduction to back riveting and my first time using Proseal.  I look forward to the new processes.


Tuesday, January 17, 2023

Let There Be Heat! And Building Resumes...

Heat in the Garage

 Well after a two month hiatus due to bitter cold temperatures, my workshop has received an upgrade.  We have run a fresh line for power and installed a mini split in the garage.  Now my garage is not 100% insulated as the outer walls are not shared to living space, so I had to insulate whatever I could.  I insulated the ceiling space, front doors, and cleaned up the weather stripping to insure I am as tight as I can be without drilling into the walls.  After that was done, my HVAC friend came by and installed our new mini split.  I am not expecting 75 degrees in the winter, but keeping the room above 60 makes it comfortable to work out there and not be freezing.  I gave it a quick test the other day and I am quite happy so far.  It will also be nice in the summer if its scorching as I can cool the garage as well.  Back to work now!

Let there be heat....

Christmas Tool and Workshop Additions

In other news, Christmas came and I added some new tools to the collection.  I know there are plenty of tools and parts that I will purchase over the life of my build, so I have started to compile a list of everything I will need over time.  I am starting with some basic tools and will buy some parts as I approach needing them.  However, my family has come through and picked up some basic tools for Christmas.  I now am a proud owner of a soldering iron, label maker, 12" offset back rivet set, and some extra countersink cages.  These will all be quite useful and helpful as my build continues.  I am going to continue updating my list of things and hope that my future birthdays and Christmas' will help lighten the hit to my wallet.  

My Wife's Christmas Gift to Me.

One thing that I was super excited about was a surprise gift from my lovely wife.  We all know that the spouses will either make or break any home build, but mine has been amazing.  From the minute I asked to do it, she has been supportive and willing to help anytime I need.  Now, I haven't had to have her crawl into the tail cone yet, but I think she will do so without issue.  She purchased me a sign for the workshop that I cannot express my gratitude.  I am so happy and have mounted it on the wall right above my workbenches.

Building Resumes....

I've continued to build on the rudder section.  I began where we left off with match drilling the entire rudder skins and substructure.  I have now disassembled and labeled the skins.  I got to break out a new tool and play with that tonight.  The new tool is the Cleaveland Edge Forming Tool.  I broke it out of its plastic finally and played with it on the scrap pieces I have.  The directions were not very detailed, it only said don't over do it, but the website for Cleaveland had a short video describing how to adjust and do it.  I still am not overly thrilled by the video, but it is good enough.  The real question is trying to determine how much is overdoing it.  I might reach out to my tech advisor to discuss this briefly before doing it.  So thats where we will continue next, edge forming and deburring for priming.

Rudder structure all built and match drilled...  Time to take it apart now...


Wednesday, October 5, 2022

Vertical Stabilizer - Part 3 of 3

 So I have been busy lately trying to finish up the vertical stabilizer.  The kids went back to school last month and this has freed up a lot of time during the day.  It has given me a good four hours three to four days a week to get this completed, and I had taken full advantage.  So let's jump in.


Deburring and Dimpling - Take 1

After we finished the last section, the entire assembly was cleco'd together, the skins were mounted, and we were ready to start drilling.  I quickly match drilled the skin onto the associated spars and ribs and then started the most fun part, taking it apart to do it all over again.  I deburred all of the rib holes, deburred the skin, and I got ready for dimpling.  I had not used my DRDT yet, so I was excited to bust it out.  I got it setup on my bench and made a small adjustment to it because the dies were slightly off center.


I quickly worked my way through the skin and rib pieces.  They were pretty simple to work through.  One note to future builders, go slow and make sure to go in order.  Don't skip around or anything weird because you will forget one of them and notice it later (I missed one!).  The actual job of dimpling isn't very difficult, it just takes time to finish.  Once that was done, I went to work to completely deburr everything.  Deburring was pretty straight forward, I purchased an electric screwdriver to make it easier.  This tool was a god send, as you could just hold the trigger and move from hole to hole.

First Big Batch of Priming 

After everything was deburred and cleaned up, I sprayed it off with some fresh air to make sure there weren't any metal pieces floating about.  After my first try at priming the rear spar, I made some adjustments to my priming setup.  I got some frames from plywood sheet and bought some metal wire which I stapled over the top.  These were easily laid out over two long pieces of wood on a pair of sawhorse's.  This allowed me to manipulate the pieces and spray easily on my lawn.  I haven't quite figured out what I will do in the winter, but this works for the rest of the year.

My Priming Frames Setup

The priming went fairly well.  I am using the Stewart Systems EkoPrime and EkoEtch products which were well reviewed by Charlie Derk, another past builder in his blog (his blog is linked on my page).  The product is not as toxic as most of the other products out there.  I like this as I don't need to go as crazy and I think it will be easier to spray inside as needed.  The EkoEtch is easy to use, just mix it up in a spray bottle and spray everything.  After a quick spray, you scrub it down, and then rinse it off good.  One issue I had, I hadn't removed the outside skin blue plastic trying to protect it.  During the rinse/etch process, a small amount got stuck under the plastic which I didn't notice.  It discolored a tiny section of skin, but was easily cleaned up with some acetone and corrosion protector.  This won't even be noticed after paint down the road.

Priming Session In The Yard.

After getting the etching all done, I got right to work priming the parts.  The primer goes on pretty easy, I sprayed it all once in each direction then the other way.  It dried within minutes which allowed me to flip over everything and spray again.  It turned out pretty well, but I noticed I had some small sections where it was heavier than others, something to work on moving forward, but everything was fully covered.

Riveting Continues and Skin Riveting

After priming and letting everything set for a day, I got back to work re-assembling the parts.  I started to rivet up the rear spar and get things put together for the final time.  I wanted to try different things, so I tried using the squeezer for as much as possible and then utilized the rivet gun with an old fashioned bucking bar for the remaining sections.  

Aft spar riveting

I had a little issue when I first did the aft spar.  On page 6-4, you beginning to reinforce the aft spar with the VS-1017 doubler and the VS-1012 rudder brackets.  The directions don't really tell you any specific order to put these rivets in.  So I started attaching the brackets first, but I quickly realized I had no way to access the shop head of the middle rivets between the brackets.  So I got some practice removing the four rivets in one bracket so I could squeeze those rivets.

After the spar was completed, I got to work assembling the ribs and riveting those.  These weren't terrible, but there were some tricky ones to buck/squeeze due to the flanges or other rivets.  I think I had two rivets that ended up being unacceptable and had to drill out.  I tried to drill them as I did in my class in Atlanta, but they didn't come out as simple.  I need to modify and grind down the pliers a bit to make it easier to grip the shop heads after drilling.

After I got all of the ribs done, I got to work with the skin.  Once again, the skin takes a bit of maneuvering in order to get things lined up.  After it was lined up, I went cleco crazy to make sure things were lined up.  Get a good worklight that can shine into these parts, this way you can verify the rivets actually have captured the skin and ribs below.  The work light made this pretty easy to do.  However, alot of the rivet checking is done simply by touch with the rivet gauge due to the tight spaces in the stablilizer.

Riveting the skin on the Vertical Stabilizer.

It took me about two days worth of working, but I got the stabilizer skin fully riveted on.  A few were drilled out but it wasn't too bad.  I highly recommend trying to squeeze anything you can, but sometimes the orientation can be challenging.  The nice part of the squeezer is you can setup one calibration and squeeze a line in quick succession.  The bucking bar is a bit more involved and requires more thorough checking as you build.

So I have completed the entirety of section 6 now with the exception of the VS-1010 bracket as I am waiting for a new torque wrench.  I am going to start pulling the parts for the rudder out to get those laid out and prepped.  Hopefully next week we can get that started.

Completed Vertical Stabilizer

Things I learned or points for future builders:

  • Get a carpet or something soft to "line" the top of your workbenches.  The skins and parts can get scratched or cut with too much bumping around.
  • If you have the space for a bigger workbench depthwise, go for it.  I really wish I had a three foot deep table as parts would fit more nicely on it.
  • Organize the parts as best as you can.  The worst thing is looking for a part an having no clue where it is.  I currently have most of mine in the crate, and need to spend some time organizing them better.  I am thinking of totes/bins with numbers on them and a spreadsheet. 
  • On section 6-4 Section 5, make sure to do the doubler only rivets first, these are the AN470AD4-4.  Then do the 4-5 that hold the brackets on.
  • Figure out your priming methods early and try to have an established workflow before you get to big batches.

Coming Up Next: Section 7 - Rudder
Time to binge watch some youtube for research first :)

Wednesday, August 17, 2022

Vertical Stabilizer : Part 2

 First Mistake

It was bound to happen eventually and I am glad it happened on a small piece like the Vertical Stabilizer, but I made my first "oops".  I had successfully finished match drilling and deburring all of the spar caps for the Vertical Stabilizer.  I had gotten to the countersinking section the spar doubler and misread the "Except the hole above the VS-1010-L" section.  I started to counter sink and ended up counter-sinking the set of holes that were supposed to be left alone.  I might of been able to make it work, however I decided I wanted to do it right.  Luckily, the part with shipping was only about $45 to replace and ship to NY.  I guarantee I taped off and marked those holes immediately before starting any drilling.


VS Continued

So last week after returning from Airventure, I was eager to jump back into the build.  I didn't find as much time as I hoped at first, kids being home in the summer makes it difficult to get time, but I eventually got some.  I completed the "remake" of the match drilling and countersinking on the rear spar doubler.  Then I carefully began to deburr and round out the ribs of the stabilizer.  The directions and all the videos I watched emphasize rounding off the front ribs very well to avoid any dents or printing onto the skin at final assembly.  I went to town with my deburring wheel and got some nice edges.  


VS Ribs assembled for the first time.

The part is finally beginning to look like something of an actual part now.  It took a little trial and error to get comfortable with the ribs.  I tooled around with the 1 inch deburr wheel, a metal file, the yellow handle debur tool from Cleaveland (with the sharp edge), and the big deburring wheel.  I figured out what works and what doesn't work for me at least.  At Airventure, there was some discussion by different people about how much to deburr.  It seemed like many of the pros felt some people overdo the deburring process. I know on "Missile 29's" videos, he went pretty crazy on his VS and had noted he probably overdid it himself.  I made sure to remove any large bumps on the edges and ran the deburr wheel/tools around the other edges quickly.  I couldn't feel any major burrs and went with it.

After I did the match drilling on the ribs and finished deburring, it was time to bust out my first skin.  The Vertical Stabilizer skin is a pretty awkward skin to work on my little benches.  I got it up on a chair and spent a few minutes trying to simply get the blue protective film off.  It was finally completed and time to slip the skin over the substructure.  A lot of the videos I had watched all mentioned the skin was pretty snug and most had difficulty at first getting it on.  I had read the entire section and first tried to do one side at a time.  This proved to be a decent start,  but I quickly realized you needed access to the ribs to "manipulate" some small corrections to line things up.  

As a result, I then decided to try and follow the rivet order and start in the middle at the front of the VS1014 rib.  This was the key, but lining up that very first hole was a pain.  I recommend getting one side on and then standing the structure as in the picture above.  Put downward pressure onto the top of the skin pushing the skin "into" the structure.  As long as the rib is lined up right, the hole quickly should come into view.  Once those two holes are in, everything else was pretty easy, just move in straight lines.  It only took about 90 minutes of trial and error to figure that out and get it all cleco'd up.  It was getting late and the kids don't show any sympathy for my late hour build sessions. 


VS Skin completely cleco'd to the substructure.

My next session will include the match drilling of the skin, deburring all the holes and ribs, and my first dimpling session.  I am looking forward to getting that done and then final assembly of the Vertical Stabilizer.

Wednesday, July 20, 2022

Tail Kit Has Begun!

Inventory of Tail Kit 

Well I have successfully completed the inventory of the tail kit.  I luckily had no backordered parts so I can get going without any hiccups.  After about 5 hours of tedious counting and sorting, the small hardware is sorted and boxed away.  The skins and larger pieces are in the middle of the garage, I need to sort through them a bit more when I get a free minute.  I would like to condense the wing and tail kit boxes together if I can to free up more floor space.  I will probably do that after I get back from my visit to Osh Kosh for Airventure 2022!


Chapter 6: The Vertical Stabilizer Begins...

Now that inventory is completed, I pulled out the beginning parts and got started on section 6, the Vertical Stabilizer.  The beginning has you do some cutting on the spar caps and lots of match drilling.  I know the kit is mostly final size drilled, but some things like these spar caps have no holes when they arrive.  So I busted out the old air drill and went to town, I noticed it makes my compressor run non stop, so I am debating trying out my cordless drill for the next part and compare.  I know many have debated the ease of use vs the heavier tool, but I want to try it myself.  The other thing I noticed is my band saw it a little on the "touchy" side.  Any little movement and I honestly think it has some wiggle into the band itself.  I was trying to be as straight and precise, but it was not the prettiest thing I have done.  Cutting a 16" straight line on such a narrow piece is not very easy to do.  It has plenty of edge distance and I got lots of deburring practice and cleaned it up a bit.  


Spar Caps Cut and Cleco'd


Spar Caps Cleco'd To the VS Spar

After that I dove into and started drilling the Spar Caps to the Spar web.  This wasn't terrible but it is lots of drill, cleco, uncleco, deburr, cleco and repeat.  I can see why many of the older builders mentioned the final size holes being a godsend for us newer builds.  I can see how this extra step on a lot of parts to upsize everything can be a pain.  I found the time outside so far relaxing and enjoyable.  I hope to get the flange side done this week before leaving for Osh Kosh, my hope is to get the ribs together and maybe have a skin cleco'd before I leave.  


Airventure 2022 is Finally Here!

So Airventure is finally here.  I have been waiting for a full year since my best friend and I decided we were going to go.  It's been bittersweet to plan and think about everything.  Getting to meet some of the builders I follow online, seeing some of their completed projects, and also seeing lots of products on the market in person is going to be amazing.  One of the big reasons I got into the Van's project was everyone always spoke of the Van's Community as being the best of them out there.  The builders I have interacted with and followed all talk about that and it seems many of them build a lot of those bonds at Airventure.  I hope to meet many builders at the RV Social or Van's banquet.  I also am hoping to get some time to walk through the Homebuild camping/parking and see some finished RV-10's.  I'd love to meet some of the builders as well and pick their brain about things they opted to do or not do on their project.  One of the hardest things is making these decisions, but luckily I have some time for the big ticket items.

My buddy and I will be flying out on Monday and staying in Appleton for the 4 days we are staying.  Unfortunately we both have younger kids, and I don't think either of us could afford a divorce over this trip.  We are both blessed to have such amazing and understanding wives to let us embark on this adventure.  It might not be the big adventure of flying there ourselves, but that will come in time.  We are both in our 30's and we hopefully will have many more years to try and attend in a plane ourselves.

As I mentioned, I hope to see some items like lighting and rudder trim.  I know some builders use the aerosport product, some have a servo based system, and others just put a wedge on.  But I think taking a look at the various builds and picking the brains would be beneficial.  I am hoping to get to a few seminars and also take a trip out to checkout Fisk and maybe the tower, I am a controller after all and seeing that operation would be awesome.  So until I get back to Airventure, thanks for reading and Rock you wings.  Welcome to Airventure 2022!

Got reposted by EAA for my Airventure post! 

Thursday, May 5, 2022

Rapid Air System

 Prior to starting this project I only had a dinky little pancake type compressor.  Obviously this wasn't going to cut it for what I was going to do, and my garage only has three outlets in it, so space is limited for placement purposes.  I decided after some thought that I wanted the compressor at the back of my garage for a few different reasons.  The first is that my wife wants the garage on her side available for snow storms in the winter, so that took one outlet out of play.  The second side of the garage I utilize for my business packing and shipping, so I didn't want to move everything around to make space.  So this left me with the rear garage location only.  With this setup, I had to determine whether I wanted a long reel to use and drag everywhere or something different.  I did some googling and came across the RapidAir system.  This system uses semi-flexible tubing with push on connectors to make a air system.  I was able to put my compressor anywhere and run tubing around my garage for access.  The simplicity of the kit setup made this an easy choice and installation wasn't bad at all.

Main Compressor Hookup to System Regulator


The main compressor uses a standard flex hose to make connection to the "input" manifold, in my case it is the regulator.  This is what pressurizes the system and allows me to control the system pressure for all outlets.  I added a quarter turn valve after the regulator to allow me to isolate the system in the event I need to repair a connection or do maintenance, that way I don't drain the entire compressor tank when I open the system.

Main Drop Located Mid Garage

My main drop is in the middle of the garage off the main beam.  This gives me plenty of hose to work anywhere inside the garage comfortably and keeps the hose out of the way when necessary.  My secondary access reel is at the garage door which allows me to drag the hose outside.  This is my plan for my priming sessions, allowing me to go outside on the grass with the spray gun.  I added a filter and dryer in line to that output so I have clean air as shown below.


Air Filter and Dryer for Second Outlet.  Will be my outside paint hookup.

My "Remote" Hookup and Outside Reel at Door


After completing install, I have to say it wasn't that bad.  It took some time to plan the layout, cut the tubing, and mount everything up.  My only criticisms is that the kit doesn't contain any mounting screws, they make a size recommendation and leave you to find your own.  I wish they had just sent some screws with the kit.  So far this is a really nice layout and everything works well.  It allows me to keep the actual compressor as far from the bedrooms and minimize noise so I can work at night plus gives me flexibility to work inside, outside, or wherever.  I might add another hookup on the back of my house for pool stuff but that comes later.  For now, its plane building time.

Monday, April 25, 2022

DRDT Setup Finished and More Deliveries...

 So I got some time and finally made it to Lowes.  I was able to pickup some cheap carpet and cut it down.  I deliberately bought extra so I could cover the DRDT, Wing Stand, and some scrap to use as padding.  I still want to get a piece of ribbed carpet to act as a table runner on my workbenches.  I saw another builder who used that and it was convenient for when you dropped things as they would get caught between the ridges.  Regardless, I wrapped up the table in carpet and came across an issue.  The table dimensions really don't allow for the carpet depth, and as soon as I tried to put it over the frame, it wouldn't go down.  I ended up trimming the carpet to cover the tops and outside edges only, and ran it smooth to the middle edges.  I ran my hand all around and didn't notice anything sharp that will beat up the skins, but I plan to monitor it for a bit to be safe.  Anyone building this later, I'd recommend leaving a little space in the center gap to allow for the carpet or carpet across the top over the front.


Completed DRDT Table

After wrapping up the DRDT table, I got in my Stewart Products primer shipment.  My can of EkoPrime and EkoEtch arrived so I am now ready to start priming parts.  I looked into the first two sections of the wing build and thought about things I would need.  I have made my run to Harbor Freight for a Tap and Dye set for fabricating the tie downs and some other odds and ends.  I also have ordered some paint strainers and a vice for the table which should come in the next day or two.  I am hoping to start match drilling by the weekend.

In other thoughts, I also have been debating how to organize the garage.  I ended up buying two deep hooks to hand on the ceiling joist.  These allow me to hang the longer narrow pieces like J Channels, Spars, and such off the floor and out of the way until I need them.  The actual spar crate only has the two spars in it and I think I will be breaking that down soon.  My current though process is to build the wing stand sooner than later.  By building the wing stand, I can store the two spars horizontally together, put the larger skins underneath on the cart, and break down both crates for disposal.  This would open up the floor space for the empennage kit to arrive late next month sometime.  However, I looked through the plans and I think it might be wise to build in order versus jumping around.  It seems like if I prep the spars, I can then start adding things as I finish each section.

I also received my order from Van's for the leading edge kits.  I have decided to move forward and go with the FlyLED's lighting kits.  I am going to use the Original kit which is only Nav/Position and Strobe lights in the wingtips.  Then I will cut a hole in the leading edge in order to mount the FlyLED 7 star lights as my taxi and landing lights.  I have seen really great feedback on their products, the cost is significantly lower than ZipTips, and it can all be done myself without too much fuss or waiting for shipment.  I plan to order all of the lights when I get to the leading edge section so I can put them in with the skins off and not kill myself doing it after the fact.  The only thing I have to decide is whether I want to do the soldering and if I want to add the Cowl light designed specifically for the RV-10.  I plan to hold off on the Cowl light until the very end, but I will see how Guil from BuildFlyGo likes his setup.  He will be done well before me and I can get his thoughts on midline lighting as he isn't adding it for now.

Until next time...

Wednesday, December 8, 2021

Synergy Air Fundamentals Class

 So the day finally came and I headed out to Atlanta to visit Synergy Air South.  For those unfamiliar, Synergy Air is a builder assist company that has a large amount of experience building all models of the Van's RV aircraft.  They offer a builder fundamentals class once a month for $250.  This full day course is mostly all hands on and they demonstrate and give practical time to try all the tools that are commonly available/used and the methods for using them.  For someone who has no aircraft building experience or metal work experience, this class was an eye opener for a few things.  But more on that in a minute.  They also offer a empennage build assist class where you would build the empennage with one of their experience technicians.  The nice part is you can bring other help yourself and make the best of the time to maximize it.  This is useful for people looking to build quickly or to get a lot of help at first and learn the basics.  The problem is, you need to be able to take two weeks of time off, pay to stay down there for two weeks, plus pay the additional cost for the build assist time/materials.  Now many people are willing to do so, but working full time and having young kids at home, I think doing the empennage build would land me on the divorced list quite quickly.  But back to my class....

Flying down to Atlanta... Got to sport the aviation facemask.

The Fundamentals Class

Die and Bit Holder.  This was an easy way to organize everything.

After my short one night stay I headed out to Synergy Air for the early morning start.  The class starts at 7 AM which is rough, the town is about 10-15 minutes away from the airport, so it's an early rise and start to the day.  I was up so early that the hotel breakfast had not even been started when I left.  I arrived at the airport and the conditions were heavy fog with an extremely low ceiling.  With the inability to see much, it took a few minutes to find my way to the hangar, figure out parking, and get inside.  I was about ten minutes early and I was shocked to be the first arrival.  The class is capped at six students and they pair everyone up to work in three groups.  The class has two instructors, Allan who is the lead for the whole facility and then one of his techs.  While we were waiting for the rest of the class to arrive, Allan was kind enough to show me around his hangar at the airplanes currently being built.  There were three RV-10's being built in the main hangar plus two other models.  He also mentioned he had some other aircraft his secondary storage hangar (we got to visit and check those out during lunch).

After a short wait, the rest of the class showed up (Well most of them...).  Four gentlemen had signed up to take the class together who were local to the area.  The fifth student we were waiting on actually never showed up, so we ended up with only five people.  This worked out for me since the four guys that were together naturally paired up, leaving me alone to work on the project by myself.  This was great as I got additional hands on time with all the tools, techniques, and project in general.  Allan had me work with his tech on some of it just for time purposes, but he let me do much more than I would of if splitting it with another student.

We started the two projects after about a twenty minute discussion of building techniques and basic terms.  We were given a small book with this information to take home.  The first project was a simple example of riveting two aluminum sheets together and then to a J-Channel.  It made us demonstrate dimpling, deburring, counter-sinking, and riveting.  We used the Cleaveland Main Squeeze and DRDT-2 for this project.  We also discussed some techniques for drilling and using a rivet fan for laying out holes.  It really was a fun little introduction.

After we finished the first project, we continued on to the large project, the small "wing".  This project is the same one Van's sends out and was a great reinforcement to the techniques we used.  We continued and expanded with using a pneumatic squeezer, pop riveter (manual and hydraulic), various deburring methods, and other techniques.  It really was eye opening to see how things came together and the various methods  I will have to use later in the build.  I did get a laugh that I was moving along faster than the other two groups with both projects.  I actually had to keep stopping to let them catch up.  I guess it means that I was doing a decent job, my partner (the Synergy Tech) had complimented me multiple times on nice work for being new to it.  

My Final Thoughts

After we were all said and done, the day wrapped up and we were able to admire that we completed the two sample projects.  Apparently, when our kits arrive, the same two practice projects will be in the kit.  So, I guess I will probably get to do it alone in my own workshop and configure/setup some of my tools before the real build.  So what were some of my takeaways?  I realized that having an organized workshop is quite helpful.  I also realized the importance of monitoring your air tools and insuring you use proper pressures.  I will definitely be making a few changes to my setup than what I originally had planned.  I will detail some of this later when I get it all done.

So what are my final takes?  The fundamentals class was 100% worth the trip.  I really wish I was able to do the empennage class, but I prefer to keep my wife and kids around.  However, I did like that you can come down at any point in the build and pay for time with a tech later.  In the back of my mind, I think it would be more beneficial to get help during the avionics, interior, fiberglass and engine hookup at the end.  Right now, I think this is gonna be the biggest thing for me.  But I got quite some time before that is even a discussion or thought.

Friday, November 26, 2021

Black Friday Shopping


 So I waited around for this weekend to take advantage of the Black Friday deals at Harbor Freight.  Combining the sales and my 10% off my purchase I was able to save over $120 on my 1,000 tool purchase.  I got some safety gear, my compressor, other air tools, and some other odds and ends.  My DRDT2 also arrived and I have to finish setting up the tables for it. That’s where my workshop stands for now, until my Synergy class next week.  After class I will setup the tool box and organize things, I honestly have no clue what some of these items do, so this class should be enlightening.


In other news, my flight training continues. I had my oral exam for my instrument rating this morning.  It went quite well and I was successful in completing that. Unfortunately for my, I had to take a discontinuance due to high winds and low ceilings.  Trying to fly a checkride in 32 knot gusts is not my idea of a fun time.  We will reconvene for the flight portion after I get back from Atlanta, hopefully with some nicer weather and calmer winds.  

Thursday, October 28, 2021

Workbenches Are 95% Done!

 So the last few nights I’ve been out in the garage working into the wee hours of night.  It’s great because the kids and wife are sleeping and I can work uninterrupted. It took about three sessions of working but I’m 95% done with the EAA tables.  I need to finish up the trip on one table, get wheels from Harbor Freight, and sand them a bit to clean them up.  I am quite pleased with the outcome and getting excited.  I got an email also that my Cleaveland tool kit will be here tomorrow!  Looking forward to the first “shipment” concerning my RV-10 Build.  Time to fill up the toolboxes now.  


Tuesday, October 26, 2021

Workbench or Bust.....

 So things from summer have finally settled down now that school is back in session.  With my son being at school all day I find a little more time to get things done around the house.  My three year old is quite a good helper as she just loves to help Daddy.  We finally found a nice day out and we cleaned out the garage.  A little bit or organization and some serious vacuuming was done over the afternoon and the garage was looking amazing.  

Last week we took a "Daddy and Maddy" outing to Lowes.  She was super excited to go shopping with Daddy and didn't care it was for me.  We made our way around the lumber and hardware sections to locate everything we needed to build the EAA workbenches.  We used the shopping list off of the online planes from EAA 1000's website.


After purchasing the wood and supplies I finally got some free time and began to construct the table.  I broke out my chalk line and marked off the plywood and got to cutting.  One recommendation to others, have Lowes or Home Depot rip the plywood in half for you. It is very difficult to cut across a 4 o 8 foot section of plywood without a little bit of drift.


After getting all of the plywood pieces cut down, it was time to break out the mitre saw and start cutting the 2x4" pieces to the appropriate lengths.  It was not too bad and I decided to cut sections in an order which I needed them.  It made it simpler to manage as I could assemble sections as I went.  After the kids were in bed, I finally got to assemble the first tabletop and see some results.  


Now that I have the first top done, I plan to finish up the second one and construct the rest of the table tonight.  In other news, I've also placed my order from Cleaveland Tool for my RV-10 kit.  I have to give them credit as the Rivet Gun was out of stock so I signed up for notifications for when it came back in stock.  The next day, I received an email saying it was back in stock.  I emailed Cleaveland and Annette almost instantly responded and said she could add it to the order and sent me the revised invoice.  I have been super happy with her answering my silly questions and promptly helping with the updated order.  I look forward to any future dealings with them based off the interactions so far.  They really seem to be a stellar company to deal with.


Saturday, August 28, 2021

So What Now?

 Prep work has begun and is going into overdrive.  I touched base with my local tech counselor who is also a past RV-10 builder.  He gave me some good suggestions to get started and I will start there.

I signed up for Synergy Air’s Fundamentals class this coming December.  This class will show me how to rivet, countersink, dimple, and other essential skills to do the majority of aluminum work on this build.  This is a good basis of knowledge to get started.  I plan to do a fiberglass and Electronics/avionics class down the road when those times come.

I’ve spoken to Cleaveland Aircraft Tool and will order the tool kit soon.  I am going to finish cleaning up the garage and get the workbench done before diving into that setup.  I don’t want to wait too long as the DRDT2 has been in and out of backorder.  That is essential to get started, so I don’t want to wait until the last minute. 

Time to finish cleaning and getting ready.  December will be here before I know it…….

Airventure 2024 Recap

 So Airventure just passed and the annual pilgrimage to Osh Kosh has ended.  They reported over 13,000 aircraft operations over the course o...